
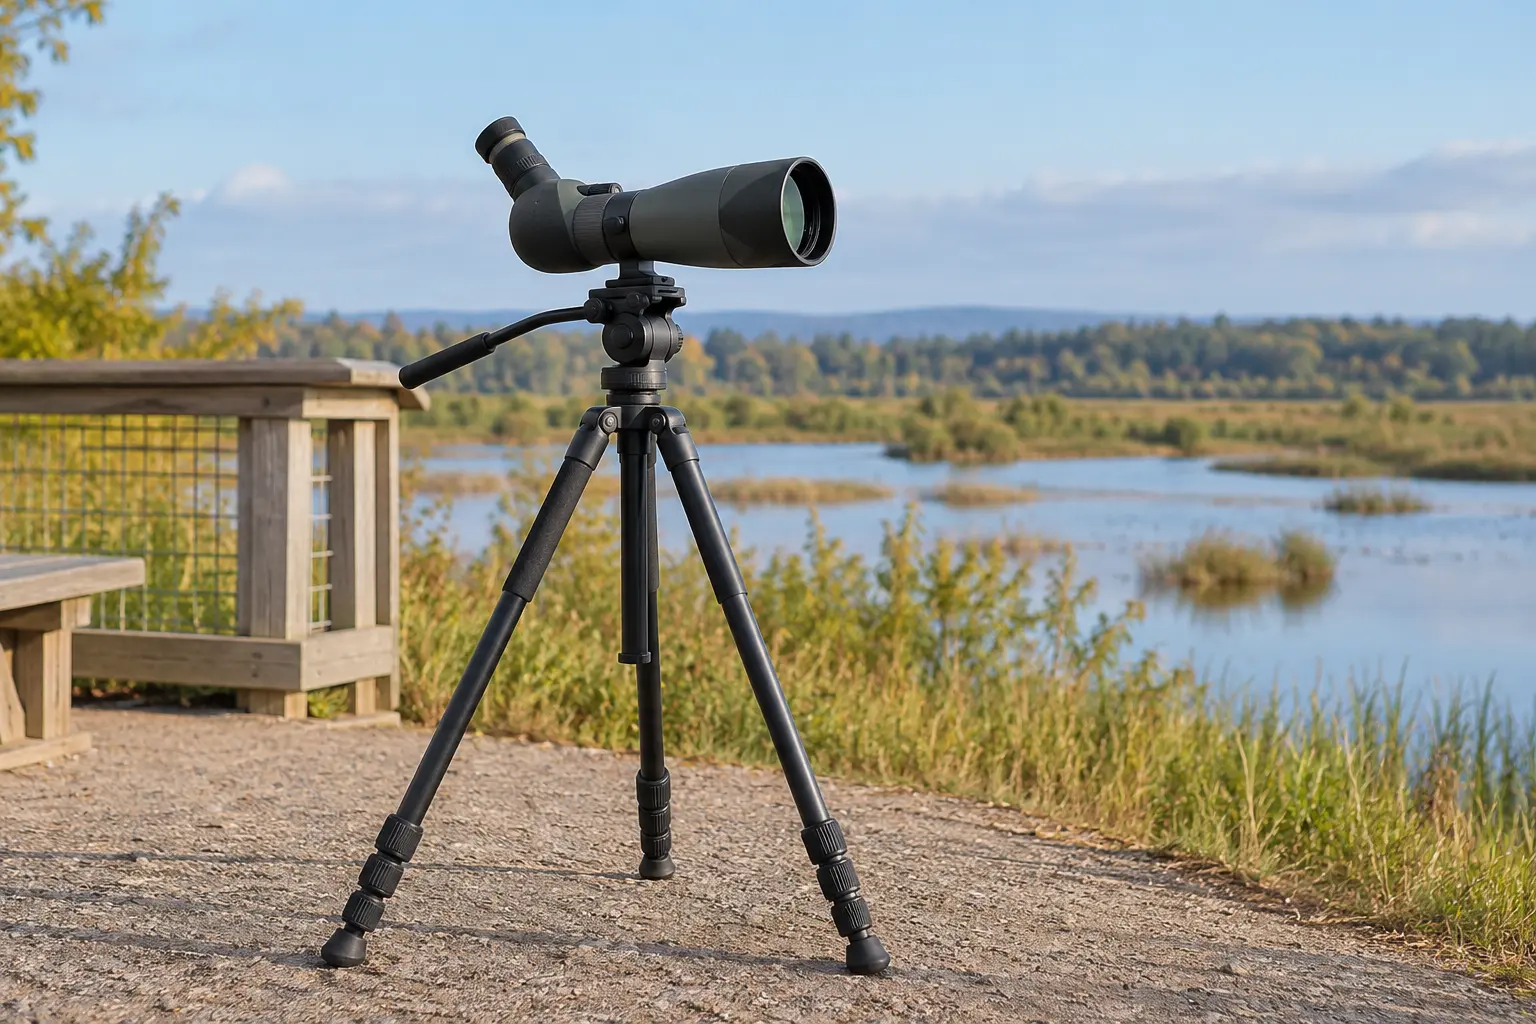
Learning how to set up a spotting scope begins with stable ground, a clear view and enough space for other birdwatchers to pass safely. A steady tripod, correctly secured mounting plate and comfortable viewing height matter as much as the scope’s optical specifications. High magnification can magnify vibration, so the correct setup should prevent the instrument from shaking after every focusing adjustment. Choose a spot away from steep drops and do not place tripod legs where people might trip. Never look at the sun through a scope, since concentrated sunlight can permanently damage eyesight.
A setup that shakes or slowly tips can prevent useful bird observation even with an excellent scope. Compare suitable heads and leg systems in our spotting-scope tripod guide; for recording a steady view with a smartphone, continue with the phone digiscoping tutorial.
Inspect the tripod before mounting
Check all leg locks, head controls and the quick-release plate for secure operation. Confirm that the rated capacity applies to the total weight of the scope, eyepiece and adapters rather than only the bare optical tube. If a clamp is loose, do not improvise a repair while valuable optics are attached. Familiarize yourself with the head’s tilt and pan resistance so it cannot suddenly release its load. A stable setup starts with compatible, undamaged hardware, not with tightening controls to their maximum after the tube is already wobbling. If the complete kit must go on a walk, compare lightweight hiking spotting scopes together with the head and legs you will carry.
Place the legs securely
Spread the tripod legs wide enough to form a stable base, using firm ground under each foot. Adjust individual leg lengths to compensate for uneven terrain rather than leaving the whole assembly leaning to one side. Avoid extending the narrowest sections farther than required because excessive height increases movement in wind. Keep leg ends away from the edge of footpaths and platforms. For observing from an accessible hide, ensure that viewers can approach the eyepiece safely without stepping over a support leg.

Attach the scope correctly
Fit the scope’s mounting foot or compatible quick-release plate using the fastening method given by the manufacturer. Keep a hand on the optical tube while engaging the plate and safety latch. Verify that the mount is fully seated and cannot slide or rotate before releasing your grip. The clicking sound of one latch may not mean every lock has engaged. If the scope features a rotatable collar, adjust it to the intended angle and secure it. Do not attach a heavy camera or phone until the basic assembly is stable.
Balance the load
Large objective lenses and heavy eyepieces shift a scope’s centre of gravity. A suitable head may allow the mounting position to move until the instrument stays controlled during tilting. If the barrel drops forward when friction is reduced, review balance and head capacity. Do not simply tighten an undersized head until every control becomes difficult to operate. Balance can change again when a digiscoping adapter is added. A controlled, predictable head makes bird tracking easier and reduces the chance of sudden equipment movement.

Adjust eyepiece height
For a straight scope, the eyepiece often needs to be close to the viewer’s eye level. An angled scope commonly allows a lower tripod because the user looks downward into the eyepiece. The best height avoids constant neck extension, stooping or strain. If observers of different heights share the instrument, make adjustments carefully and preserve stable foot placement. The geometry of a bird hide window may also influence where the scope should sit. Ergonomic comfort is essential during long observations.
Begin with low magnification
A scope at maximum power shows only a narrow section of habitat, making it difficult to acquire a bird. Start near the low end of the zoom range and locate a recognizable landmark with naked vision or binoculars. Move the head smoothly toward that landmark and centre the subject before increasing magnification. If the bird disappears, zoom out and reacquire it instead of searching randomly through a narrow high-power field. This habit makes using a scope much easier for beginners and reduces unnecessary tripod movements.
Focus gently and accurately
Choose a detailed stationary subject and slowly turn the focus control until its edges look clearest. Some scopes have dual-speed focusing; a coarse control may help find the target, while a fine control refines sharpness. Never force a wheel beyond its mechanical stops. At higher zoom, the image may shake while the control is touched, so release it and allow vibration to settle before judging focus. Heat shimmer can also make a correctly focused distant scene look soft, particularly above warm ground or water.
Set eye relief and eyecups
The viewer should see a complete circular image without uncomfortable pressure on the eyepiece. People who wear glasses commonly retract eyecups, while those without glasses may extend them. Adjust until black crescents or cut-off edges disappear. Actual comfort depends on the eyepiece’s usable eye relief and each observer’s face and frames. Zoom settings may change the viewing experience, so test both low and high power. If the field remains obscured, a different eyepiece may be more suitable than forcing the viewing position.
Improve stability in wind
Strong wind and vibration can erase the detail that higher magnification is supposed to provide. Choose shelter when possible, lower the tripod to a comfortable practical height and avoid extending thin leg sections unnecessarily. Touch the scope as little as possible while observing. Some tripods support stabilization accessories, but do not suspend heavy objects in a way that creates a swinging hazard or exceeds capacity. When the image remains unstable, reducing zoom may produce a more informative view than persisting at maximum power.

Learn smooth panning
Set the head resistance so the scope moves deliberately without sudden jumps or uncontrolled drooping. Practise following a slowly moving subject while keeping a comfortable hand position. A scope can be effective for a walking shorebird, but fast flying birds are often easier to track with binoculars. If the target leaves the field, decrease zoom before searching again. Avoid swinging a large tube abruptly toward companions, nearby tripods or obstacles. A predictable head and calm movements matter as much as raw optical performance.
Using a phone adapter
For digiscoping, check that the adapter fits the actual eyepiece and positions the phone camera correctly over the optical exit pupil. Mount the phone securely and review the balance of the scope on the head. Heavy phones may cause an otherwise stable assembly to tilt. Begin with a stationary subject, achieve optical focus, then align the phone and adjust camera exposure. Avoid holding an unsupported device against the eyepiece while operating tripod controls. Not all universal adapter products fit every eyepiece or modern multi-camera phone.
Pack the equipment safely
When finished, reduce the scope to a manageable orientation and keep a hand on it while unlocking the quick-release plate. If moving over uneven terrain, detach and case the optical tube unless the manufacturer explicitly supports carrying an assembled system. Replace caps and protect the eyepiece. Collapse tripod legs carefully and make sure small plates and accessories are accounted for. If rain or dew has dampened the equipment, dry the exterior according to the manufacturer’s guidance before sealing it into long-term storage.
Develop a repeatable checklist
Before each outing, check safe ground, leg locks, head capacity, mounting-plate security and tube balance. Set a comfortable eyepiece height and begin at low magnification. Locate the bird using a landmark, focus carefully and increase power only while it reveals useful detail. Keep the tripod clear of foot traffic and use a respectful distance from wildlife. Before leaving, inspect the equipment and account for the accessories. Repetition of this short field procedure builds fluency, preventing both accidental damage and frustrating lost sightings.
Final setup guidance
A stable spotting-scope setup begins with compatible equipment and a safe observation point. The tripod must hold the full scope and accessories securely, the eyepiece should suit the viewer’s posture and eyesight, and targets should be acquired at lower power before increasing zoom. A carefully supported modest scope can deliver more useful detail than a premium optical tube on an unstable stand. As your experience grows, adjust the setup to the habitat, wind and subjects you encounter rather than trying to use one maximum-height, maximum-power configuration everywhere.
Reference
Cornell Lab: How to choose a spotting scope
About the author
Simon Jack
Simon Jack is the named author of FieldLens Guide's research-based binocular, spotting scope and wildlife observation articles. His published editorial approach focuses on verifying model-specific manufacturer specifications, explaining optical tradeoffs in plain language, and matching equipment to real birdwatching, hiking and nature-observation needs. These articles do not claim hands-on product tests unless explicitly documented.