
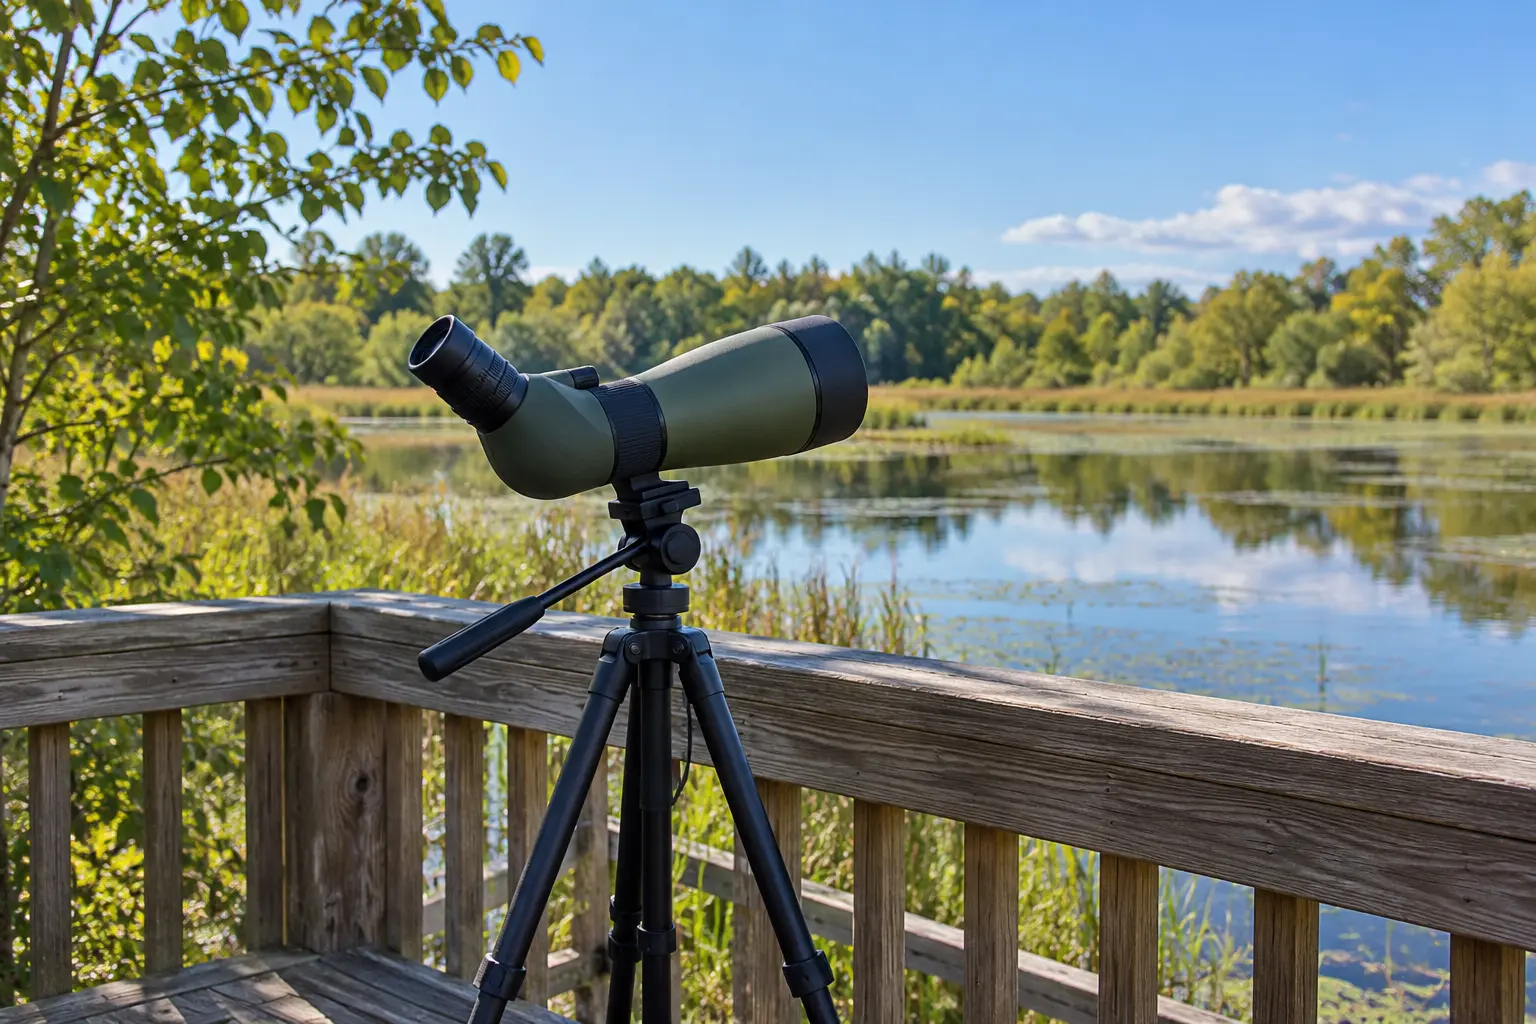
The best spotting scopes for beginners make it straightforward to find a bird, bring it into focus and keep the image steady. That usually matters more on a first purchase than reaching the highest advertised magnification. A complete starter outfit can reduce the number of accessories you need to choose, while a separately selected scope and tripod may better fit your height, walking distance and viewing location. This guide compares five options, from a small day-trip scope to larger models for fixed wetland viewpoints. We explain the practical differences in starting power, objective size, close focus, eyepiece comfort and total cost. Use the quick verdict to identify a sensible starting setup, then read the product tradeoffs before deciding whether the scope, its included accessories and your chosen support work together.
Affiliate Disclosure: We may earn a commission at no extra cost to you when you make a qualifying purchase through affiliate links in this guide. Buying buttons open Amazon.com. Read our full affiliate disclosure.
Best Spotting Scopes for Beginners: quick comparison
On smaller screens, swipe across the table to compare all features and buying options.
| Image | Model | Beginner advantage | Core tradeoff | Where to buy |
|---|---|---|---|---|
 | Nikon PROSTAFF 3 Fieldscope Outfit 16–48×60 | Complete starter package | 10 m minimum focus limits nearby nature viewing. | Check PriceAmazon |
 | Celestron Ultima 18–55×65 Angled | Accessible first full-size scope | An appropriate tripod and head add to the purchase cost. | Check PriceAmazon |
 | Celestron TrailSeeker 16–48×65 Angled | Learning precise focus | 48 oz body is not a lightweight hiking option. | Check PriceAmazon |
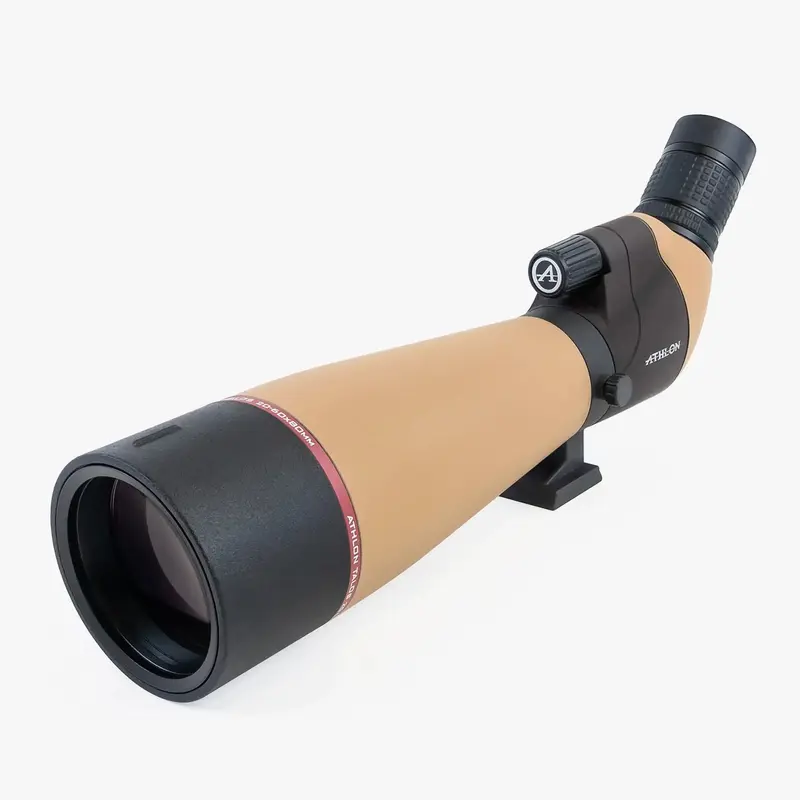 | Athlon Talos 20–60×80 | Stationary budget exploration | 82.9 ft low-power field takes care when finding subjects. | Check PriceAmazon |
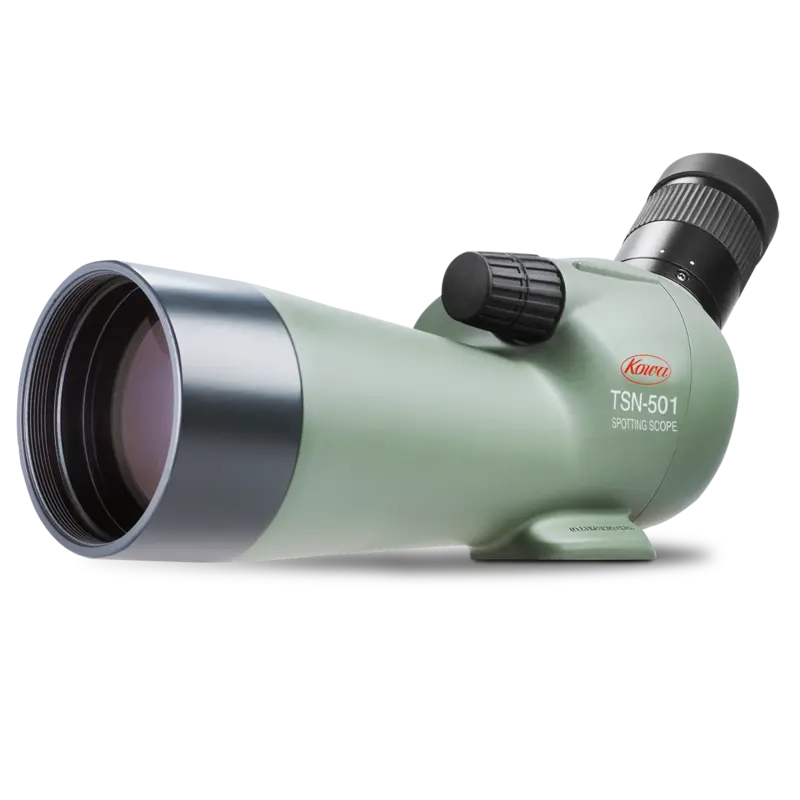 | Kowa TSN-501 20–40×50 Angled | Small first scope for day trips | 14–12.5 mm eye relief can be restrictive with glasses. | Check PriceAmazon |
Open Amazon for the current price and availability. Confirm the exact model, condition and package contents, including any separately required eyepiece, tripod or accessories. Tax and shipping may affect the total.
How we chose these models
A beginner needs a complete usable setup, not merely the largest objective. The Nikon outfit, two Celestron sizes, Athlon 80 mm and small Kowa illustrate different starting powers, carrying demands and support requirements. They let readers compare an introductory outfit with standalone scopes while keeping eyepiece inclusion and tripod needs explicit.
- Check what is included before comparing purchase costs.
- Use low-power field and focus control to judge how easy a bird will be to find.
- Choose the scope and support together for a comfortable viewing height.
These comparisons use manufacturer documentation and published model specifications. We have not conducted hands-on product tests. See how we review optics for the research and correction process.
01 / Complete starter package
Nikon PROSTAFF 3 16–48×60 Outfit
Nikon specifies a 60 mm objective, built-in 16–48x zoom and 19 mm eye relief at 16x, with a scope body weight of about 620 g. A compact tripod and carrying case are included in the maker’s described outfit.
Amazon.com
Product image: Nikon.The principal advantage for a new observer is reducing the number of separately sourced accessories. Having a supplied eyepiece and basic support makes it easier to begin learning how to centre and focus distant subjects. The 16x starting power is also relatively forgiving for finding birds on a shoreline compared with beginning at 25x or 30x.
An included compact tripod is not necessarily the best stable, standing-height support for every person. The manufacturer lists a 10 m closest focusing distance, so it is not a near-garden specialist. This product should not be confused with the PROSTAFF 5 family, where separate eyepiece and body choices may apply.
Before recommending the outfit to a buyer, confirm the actual package includes the tripod and case shown for the exact U.S. listing. Check how much height the supplied tripod provides at a seated or standing location. Eye relief at 16x is promising but must be assessed at the actual viewing positions used.
Reasons to choose it
- Outfit includes a compact tripod and carrying case.
- 16x starting power and a 60 mm objective.
What to weigh up
- 10 m minimum focus limits nearby nature viewing.
- Included support may not suit your standing viewing height.
02 / Accessible first full-size scope
Celestron Ultima 18–55×65 Angled
The Celestron Ultima 18–55×65 uses an angled eyepiece and an integrated zoom. Its 65 mm lens is a more moderate objective size than common 80 mm systems, while the zoom reaches higher apparent enlargement than small travel scopes.
Amazon.com
Product image: Celestron.This is a useful first comparison point when you want to watch distant lake or wetland birds and have a limited budget. The body angle may simplify sharing among people of different heights. A 65 mm scope can be less unwieldy than a larger 80 mm option in a practical tripod kit, although exact weights and dimensions must be checked.
Do not import the 20–60×80 Ultima’s field, weight or eye-relief numbers into this 18–55×65 version; those are different products. An appropriate full-height tripod and head may raise the total cost.
Check the exact 65 mm version on the U.S. order page, the included eyepiece and case, and the minimum viewing distance before purchase. The most informative first use is to test 18x subject acquisition and then check whether zooming upward adds useful plumage detail.
Reasons to choose it
- 65 mm objective between small travel and large 80 mm formats.
- Angled 18–55x zoom configuration.
What to weigh up
- An appropriate tripod and head add to the purchase cost.
- Specifications differ from the larger Ultima 80 mm version.
03 / Learning precise focus
Celestron TrailSeeker 16–48×65 Angled
The manufacturer gives 16–48x zoom, 65 mm objective, 136–68 feet of field at 1,000 yards, 18–15 mm eye relief, 18-foot close focus and 48-ounce scope weight. Dual-speed focusing and a rotating tripod collar are documented features.
Amazon.com
Product image: Celestron.For someone learning to sharpen a distant subject, the separation of coarse and fine focus can be worth investigating. Starting at 16x also offers room to identify a shoreline landmark before magnifying the bird. The rotating collar may help position the angled eyepiece comfortably from a seated hide.
At 48 ounces without tripod, the TrailSeeker is not a lightweight pocket companion. Its extra controls may be unnecessary for casual users who observe only a few times per year.
Try moving from a distant reed to a more distant tree, using the coarse adjustment first and fine adjustment afterward. Confirm that the tripod head holds the scope without drooping at full zoom. Spectacle users should check the complete field at both 16x and 48x.
Reasons to choose it
- 16x starting power and dual-speed focusing.
- Rotating collar in a 65 mm angled scope.
What to weigh up
- 48 oz body is not a lightweight hiking option.
- Eye relief declines across the zoom range.
04 / Stationary budget exploration
Athlon Talos 20–60×80
Athlon publishes a 20–60×80 configuration with a 45-degree eyepiece, 82.9–48-foot field at 1,000 yards, 19.7-foot close focus and 38.5-ounce scope mass.
Amazon.com
Product image: Athlon.An 80 mm objective is worth comparing when a beginner intends to observe from a fixed location and can provide stable support. The Talos helps illustrate that magnification and aperture are available at modest prices, though they do not guarantee optical quality or ease of use.
Its low-power field is relatively narrow compared with some 16x alternatives, making target acquisition more demanding. A bundled tabletop tripod described in older catalogues may not suit standing birdwatching.
Check whether you can find a wader without repeatedly searching at high power. Try the zoom in typical afternoon conditions and notice whether extra power produces more useful detail. Include the cost of a suitable tripod in any comparison with a more expensive ready-made outfit.
Reasons to choose it
- 80 mm objective for stationary viewing.
- Angled body with a 20–60x zoom.
What to weigh up
- 82.9 ft low-power field takes care when finding subjects.
- A suitable full-height tripod is a separate consideration.
05 / Small first scope for day trips
Kowa TSN-501 20–40×50
Kowa identifies a 50 mm objective, 2.5 m closest focus, 239 mm body length and 400 g weight for the angled TSN-501. Its integrated 20–40x eyepiece has 14–12.5 mm published eye relief, with a 40–28 m field at 1,000 m.
Amazon.com
Product image: Kowa.This model shows beginners that a scope need not require a large 80 mm objective and bulky tripod. The short body and 400 g weight can fit easily into a light observation kit, and the 2.5 m closest focus creates opportunities to study nearby birds or other nature subjects in daylight.
The 14–12.5 mm eye relief deserves care for spectacle wearers. Smaller objective size and 40x top magnification are real limitations for someone intending to examine shorebirds at great distances through poor light. The current selling price and U.S.
Before buying, confirm that a 20x low setting is comfortable for your expected subjects, and compare the field while wearing your usual glasses. Its low carrying weight should be assessed as part of an assembled tripod kit, not just as an isolated instrument.
Reasons to choose it
- 400 g integrated 20–40×50 scope.
- Angled body with 2.5 m close focus.
What to weigh up
- 14–12.5 mm eye relief can be restrictive with glasses.
- 50 mm objective changes low-light flexibility.
What to consider before buying
What makes a spotting scope beginner-friendly
A first scope should make it reasonably easy to locate, focus and observe a distant bird without requiring expensive knowledge or complex accessories. Starting zoom, the smoothness of the focus mechanism, tripod stability and correct eyepiece fit are more important than owning the highest possible magnification. A body with a complete usable eyepiece removes uncertainty about compatibility. Someone who observes from a fixed window may value a different instrument than a person walking between habitats. Identify those conditions before turning this guide into a shopping list.
Choose binoculars first when appropriate
Not every new birdwatcher needs a spotting scope immediately. A comfortable 8x binocular is portable, reveals a relatively broad view and follows movement quickly. A tripod-mounted scope adds considerable apparent image scale but is slower to aim and more cumbersome. If almost all your birds are nearby woodland species, a scope may rarely leave its case. If most are distant shorebirds on a mudflat, the higher-power view could become useful early. Our binocular-versus-scope guide covers the distinction without equating sophistication with zoom.
Low starting magnification reduces frustration
A beginning user can find a bird through a broad 16x field more easily than through a narrow 40x field. Aim using an obvious shoreline landmark and increase zoom only after the target is centred. In this shortlist the Nikon and Celestron TrailSeeker begin at 16x, while Kowa and Athlon begin at 20x. These are meaningful differences, but the actual field widths still depend on eyepiece design. Avoid comparing magnification numbers without reading the maker’s field specifications and trying target acquisition in practice.
A 50 mm scope is not just a miniature 80 mm
A small objective can reduce carrying weight but changes potential light collection and often the available zoom range. The TSN-501 can be a sensible instrument for daytime walks even though it is not designed for the same high-power fixed-site role as the Talos 80. The difference becomes important on overcast days or in the late evening. Objective diameter alone does not measure transmission or sharpness, and a better-designed small optic may be preferable to a larger inexpensive one. Match the format to your usual time and place of observation.
Do not overlook the total tripod cost
Even a well-made spotting scope can be frustrating on a support that shakes or droops. Confirm which packages include a tripod, then decide whether it suits your own seated or standing height. A tabletop tripod may work from a solid bench but be useless in a reedbed with no suitable surface. Full-height tripods need an appropriate head and securely fitting mounting plate. Calculate scope-plus-tripod cost rather than comparing only tube prices. Our tripod setup guide explains the sequence and safety checks.
Angled eyepieces and group viewing
An angled eyepiece may be comfortable when several people of differing height share one stationary bird sighting. It can also allow a lower tripod position and less neck extension when pointing upward. Straight tubes may be easier to aim intuitively through restricted openings. Neither orientation has an inherent sharpness advantage. Most models here are angled, but the Nikon outfit and other lines may have separate versions, so check exactly what a retailer provides. The choice is about viewing posture, target acquisition and transport dimensions.
Teach yourself to focus correctly
Practise on a stationary sign or textured tree before trying rapidly moving birds. Begin at low power, set the eyecup height and carefully turn the focus wheel through the sharpest point. If a dual-speed mechanism is provided, use coarse focus to approach the subject and fine focus to refine. Increasing zoom without improving focus can enlarge a soft image rather than reveal markings. Avoid forcing controls beyond their mechanical stops and let tripod vibration settle after every adjustment before judging optical performance.
Magnification versus real detail
A 60x maximum does not mean that 60x is useful every day. Warm air, haze and wind can turn a larger image into a wavering blur, particularly over water and sunlit fields. A beginner should learn the setting that reveals actual new detail under ordinary conditions. In this shortlist, 40x, 48x and 60x tops each have uses and limitations. Audubon recommends moderate working powers for many birding tasks. Select magnification for the birds you see and the support you can carry, not for advertising impact.
Glasses fit and eye relief
A scope may show the full circular field to one user while a person with glasses loses its edges. Eyepiece eye relief and eyecup position control this, not the length of the scope body. The TSN-501’s relatively short 14–12.5 mm relief deserves extra care; Nikon’s 19 mm at low power offers a different starting point. However, a published figure does not guarantee comfort for everyone. Try at multiple zoom settings and consider the actual depth of your eyeglass frames before ordering an instrument.
A sensible first field outing
Take the scope to a safe, stable observation position and practice locating a distant rock or reed. Keep the tripod low enough to be rigid yet high enough for comfortable posture. Start at the lowest power, focus, then move toward a stationary bird. Take a few seconds to assess whether the view improves as you zoom. When the bird flies, use binoculars to follow it rather than swinging the scope aggressively. This routine builds useful skill and protects equipment without requiring advanced optics knowledge.
Avoid buying the wrong variant
Products with similar names may have different objectives, orientation or bundled eyepieces. Kowa’s TSN-501 is angled whereas TSN-502 is straight; Nikon’s PROSTAFF 3 outfit is distinct from PROSTAFF 5 body and eyepiece packages. A Celestron Ultima 65 is not interchangeable with the 80 mm model. Confirm the precise manufacturer code and product configuration before accepting a merchant listing. If the scope is sold used or imported, verify return policy and service region as well.
Do you need ED glass immediately?
Extra-low-dispersion glass can reduce some colour fringing when optical engineering and construction are good. It is not an automatic guarantee of sharpness or good ergonomics. A first-time user may benefit more from a smooth focus mechanism, suitable field width and sturdy support than from paying for an unexplained optical label. If two scopes already meet those conditions, use credible controlled comparisons to decide whether ED construction brings a visible improvement. Avoid replacing the actual test with unsupported marketing superlatives.
Final beginner recommendation
Start with the complete Nikon outfit if you value a simple, integrated introductory kit and its ergonomics fit you. Compare the Ultima 65 and TrailSeeker 65 if you want a conventional angled birding scope at different levels of focusing sophistication. Consider Athlon’s Talos if you mostly observe from a static location and need a larger objective at modest cost. Evaluate Kowa’s compact TSN-501 for daylight travel, especially if a low carry weight matters. None is a universal winner; the most useful beginner scope is one that you can set up, focus and actually use frequently.
Plan the setup beyond the first scope purchase
Add a phone mount when you know what you need
You do not need a digiscoping adapter to begin learning a spotting scope. First become comfortable finding a target, setting the eyecup and adjusting focus on stable support. A phone adds another set of alignment and balance decisions behind the eyepiece. Buying it later lets you choose from the actual diameter and shape of the ocular rather than guessing from a product photograph. It also helps you decide whether recording images is something you enjoy often enough to justify the extra accessory.
If photographs are part of the plan from the start, include the phone and adapter in the supported weight and plate-balancing check. Confirm that the adapter grips the correct part of the eyepiece without obstructing zoom or eyecup controls. A familiar handset can still have an awkward camera position for a particular mount. Our spotting scope phone adapter guide compares those fitting requirements, and the digiscoping setup guide explains the process.
Read zoom specifications as a changing view
A zoom scope does not provide the same viewing experience at every setting. As magnification rises with a fixed objective, the calculated exit pupil becomes smaller. Published field of view and eye relief can also vary across the zoom range, depending on the eyepiece design. Read both ends of those ranges rather than treating the most generous figure as a description of maximum power. This is particularly important if you keep your glasses on or expect to follow movement after zooming in.
For a first scope, identify a normal working range rather than planning every sighting around the maximum number. Try locating the subject at the lowest setting, then make one controlled increase and refocus. If that change does not reveal more useful information, return to the clearer setting. You are learning how the scope, atmosphere and support work together. The objective is a view that helps identification, rather than using every part of the advertised zoom range on every outing.
Think about the space around the tripod
A scope that fits your height in an open field may need a different arrangement inside a hide or beside a viewing rail. Check where the legs can stand securely, whether the eyepiece clears the opening and whether the pan handle has room to move. An angled body may help a seated observer, while a straight body can suit some restricted viewing openings. Neither solves a tripod that blocks the walkway or forces you into an uncomfortable position.
Plan access to the focus control as well as access to the eyepiece. If a camera, bag or nearby structure interferes with ordinary adjustments, change the arrangement before judging the view. Keep a shared setup easy to approach and follow the location’s rules for equipment placement. These practical checks are inexpensive, and they can reveal why one of the otherwise suitable scope formats is a better first purchase for the places you actually visit.
Before you choose
Frequently asked questions
Should I buy binoculars or a spotting scope first?
Start with binoculars if you mainly walk, follow moving birds or want a broad view that is quick to aim. A scope becomes useful for studying more distant birds from a stable position. Many birders use both, finding the bird with binoculars before examining it through the supported scope.
What is an easy magnification range for a first scope?
A relatively low starting setting helps you find the bird and surrounding landmarks before zooming in. Compare the actual low-power field as well as the zoom numbers. Higher magnification is something to add when the target, atmosphere and support permit it, rather than the setting to begin every search with.
Does a starter outfit include everything I need?
Read the exact package contents. An outfit may include an eyepiece, a small tripod and a case, but the supplied support may not provide the height or stability you want outdoors. Check the complete setup against your intended seated or standing position instead of assuming every included accessory suits every observer.
How do I find a bird through a scope?
Begin at the lowest power. Identify a clear landmark beside the bird, point the scope toward it and bring the scene into focus. Center the bird before increasing magnification. Practice with a large stationary object first so that aiming and focus control feel familiar when a brief wildlife sighting occurs.
Can beginners use an angled eyepiece?
Yes. It may take a little practice to connect the direction of the body with the view through the eyepiece. An angled design can be convenient for shared or seated observation, while a straight design can feel more direct to aim. Try both from a realistic tripod height if possible.
What mistake most often makes a first scope frustrating?
Choosing a scope without planning its support and viewing position can make every focus adjustment or breeze disruptive. Check the tripod, head and plate as part of the purchase. Also confirm that the scope focuses at your intended distances and gives a comfortable field with the glasses you normally wear.
Sources and buying information
Product details come from manufacturer documentation for the models listed. Use the Amazon buying links for the current offer, seller, condition and package contents.
About the author
Simon Jack
Simon Jack is the named author of FieldLens Guide's research-based binocular, spotting scope and wildlife observation articles. His published editorial approach focuses on verifying model-specific manufacturer specifications, explaining optical tradeoffs in plain language, and matching equipment to real birdwatching, hiking and nature-observation needs. These articles do not claim hands-on product tests unless explicitly documented.